Remove the outer packaging of the vehicle
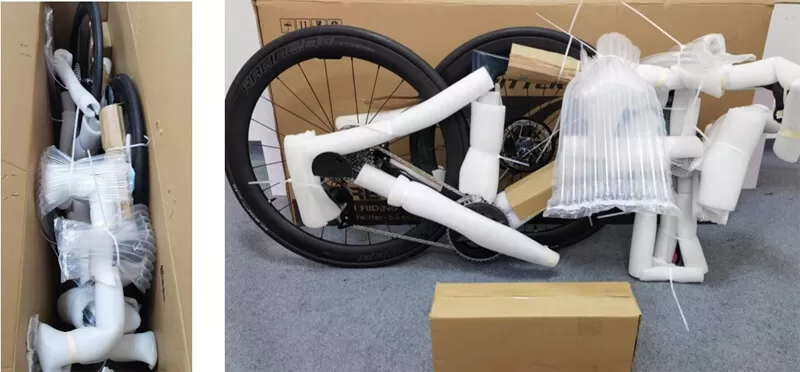
After unpacking, remove the sealing nails on the outer packaging of the carton to avoid scratching the vehicle body when holding the frame crossbar to lift the vehicle out of the packaging box. Take out the accessories carton.
2. Install the front wheel
Turn the vehicle upside down and prepare to install the front wheel. Remove the protective sleeves on both sides of the front wheel hub. Pay special attention: do not take out the metal plugs during the removal process; check whether the parts on both sides of the front wheel hub are complete. (As shown below)

Rotate the thru-axle cap, remove the thru-axle rod, and pull out the protective piece (red) in the disc brake caliper. Note: Do not pinch the brake after pulling out the protective piece. Align the front wheel disc with the disc brake caliper groove and install it into the front fork, insert the thru-axle rod, and tighten the thru-axle cap (reference torque 15±3 Nm). After the thru-axle cap is tightened, use an inner hexagonal wrench to tighten the anti-loosening jackscrew on the thru-axle cap by 3Nm.
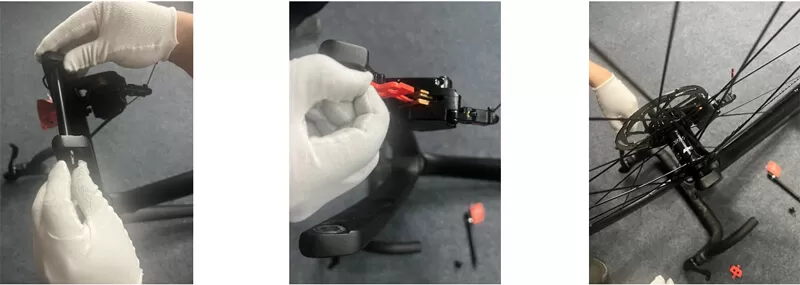
Turn the front wheel and check whether the disc brake rubs the disc. If so, refer to the video below to adjust it.
https://www.bilibili.com/video/BV1V34y1h7Kq/?spm_id_from=autoNext
When tightening the disc brake caliper bolts, tighten the upper and lower bolts alternately, no more than half a turn each time. (Reference torque 10±2Nm)
3. Install the pedals
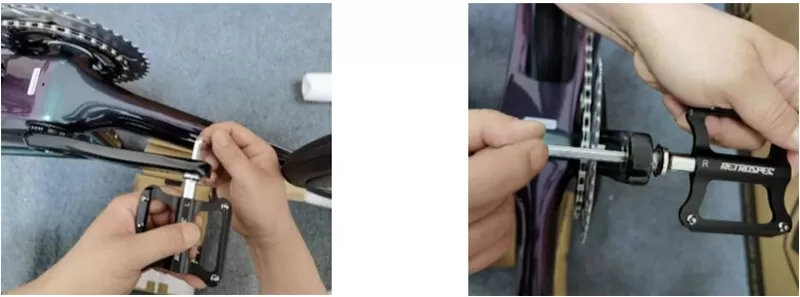
Check whether the direction mark on the pedal (L left/R right) is the same as the mark on the pedal crank. Use an Allen wrench to tighten the pedal from the inside toward the front wheel (reference torque 20±5Nm). Note: If the pedal is not tightened and falls off during riding, the inner hole of the pedal crank will slip, causing damage to the parts and affecting the personal safety of the rider.
4. Adjust the handlebars
Loosen the two locking bolts on the rear side of the handlebar, straddle the front wheel, hold the handlebars with both hands, adjust the handlebar to be perpendicular to the front wheel, and tighten the two loosened locking bolts on the rear side of the handlebar (reference torque 10± 2Nm).

5. Install the car seat
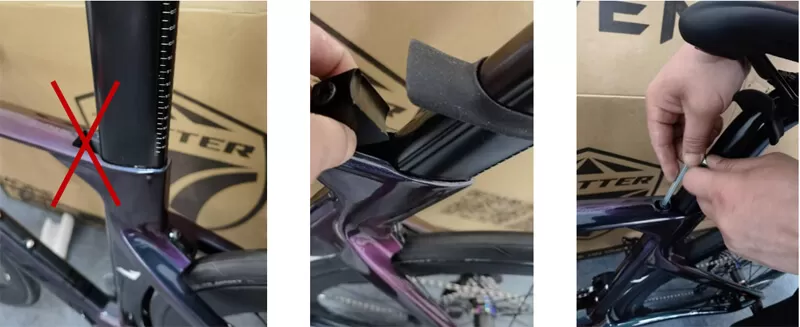
Insert the seat. Note: Make sure the lowest mark of the seat tube is submerged in the frame. If the seat tube is shortened, ensure that the insertion depth of the seat tube is not less than 140mm. Put in the seat tube bundle and tighten the seat tube bundle locking screw (reference torque 8±2Nm).
1. Inspection before riding | every time | 1. Check the tires: Check whether the tire pressure is sufficient before each ride. If it is not enough, increase it to the appropriate pressure. For the tire pressure reference value, see the tire label. (Picture attached) Check whether there are cracks in the tire wall and whether the cut tread is too shallow. If necessary, replace the tire. 2. Check the brakes: Test the front and rear brakes to check that the brake function is normal and the vehicle can be stopped. |
2. Short-term maintenance | About two months or 1000KM | If the bicycle is used frequently, maintenance at this stage is quite simple and can keep your bicycle in good condition. 1. Cleaning: To maintain the appearance of the new car and avoid corrosion of the frame, clean it as soon as possible after riding in the rain, rinse it with clean water, and then wipe it dry with a cloth. Remember to dry and re-oil the chain. 2. Oil the chain: After dripping lubricating oil on the chain, wipe off the oil on the outside of the chain after about ten minutes. Oil on the internal moving parts is enough. Excess lubricating oil on the outside will stick to dust, so Better wipe it clean. 3. Check the transmission: there is no deformation of the tail hook. (Visual inspection: horizontal observation from directly behind, and observation from directly above after the car is turned upside down, see the diagram for details) The transmission in each gear is smooth, and there is no chain skipping or gear hanging. |
3. Inspection after riding | Half a year or 3000KM | 1. Check the rim deflection: radial and end-to-end runout ≦2mm. If it exceeds this range, the spoke tightness needs to be adjusted to ensure that the rim's radial and end-to-end runout reaches the standard. (It’s called Nalong in the north) 2. Check the bottom bracket, remove the pedal crank and chainring, remove the bottom bracket inner sleeve and bearing dust cover. Use oil-based cleaning agent to clean the bearings, re-grease them and install them. 3. Check the front and rear hubs, remove the flywheel and freehub body, observe the wear and tear, clean the bearings inside the hub, re-lubricate them and install them. |
1. After pressing the manual shift button, the indicator light on the manual shift head is in a normal green state, but when there is no movement in the shifting, you can perform this operation to recalibrate.
step:
1. Open the protective rubber sleeve of the hand variable, rotate and remove the battery cover, push the battery inward along the edge of the battery, and take out the battery.
2. Use the charger to charge the rear transformer. The charging light of the rear transformer lights up red. After unplugging the power cord, the matching indicator light of the rear transformer flashes blue.
3. Use the charger to charge the front transformer. The front transformer charging light lights up red, and the rear transformer matching indicator light flashes blue quickly.
4. Insert the left and right hand transformer batteries and leave the cover temporarily uncovered.
5. Press the hand shift button and check whether the function of the left and right hand shift buttons is normal. If it is normal, align it with the gap in the battery cover and install it.
Special reminder: (The operation sequence must be strictly followed, and the interval between each step from unplugging the charging cable to installing the battery should not exceed 5 seconds)

Or search WHEEL TOP in the mobile app store
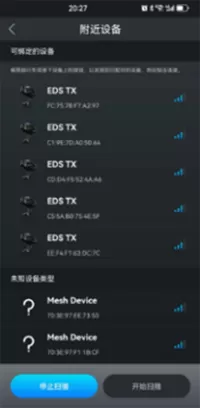
Click the + sign to search for the device, and follow the prompts to name and add it.
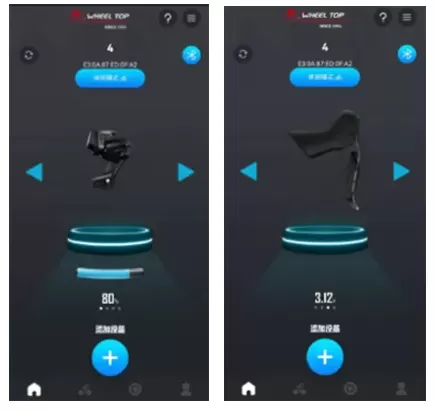
Click the Bluetooth connection button. After the connection is correct, the button turns blue. At the same time, you can view the power of the front and rear changes and the voltage value of the left and right hand changes.
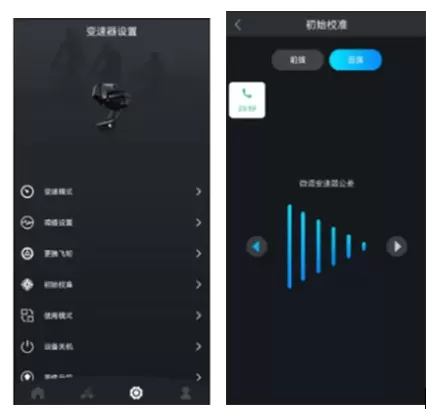
Do this if:
1. The gear shifting in all gears is inaccurate, and the first gear gear teeth or gear skipping may occur.
2. The gear is lost and the flywheel chainring cannot be lowered to the minimum when the front chainring is a large chainring.
Operation steps:
1. Manually shift the chain so that the front chainring is at the large chainring and the rear flywheel is at the smallest chainring. (If it cannot be adjusted to this position through the hand shifter, enter the initial calibration and click the left and right direction buttons to make the chain in the specified position)
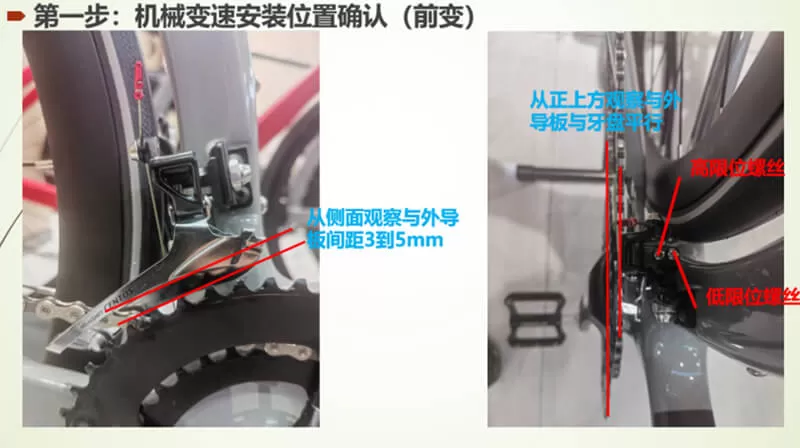
2. Zero position judgment standard: forward change, so that the chain is in the middle of the forward pull guide plate, that is, the same gap is left on both sides of the chain. When viewing the rear derailleur from the horizontal position, align the rear derailleur guide wheel with the smallest sprocket of the flywheel in a straight line.
3. Adjust the front and rear changes according to the above requirements, and then exit.
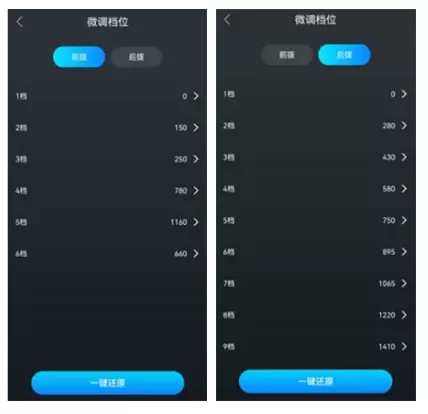
When some gear shifting is inaccurate, the first gear gear is engaged or a gear is skipped, etc., the adjustment can be made by fine-tuning some gear values.
step:
1. This permission is turned off by default. To adjust parameters, you need to ask Lunfeng customer service to enable permission.
2. When adjusting, observe the rear derailleur from directly behind the horizontal plane. If the rear derailleur guide wheel is biased toward the side of the flywheel, the corresponding gear value needs to be reduced to align it. Otherwise, the value must be increased, and its subsequent gears must also be modified accordingly. Increase or decrease a value.
3. If you press one button to restore, the factory default values will be restored.
